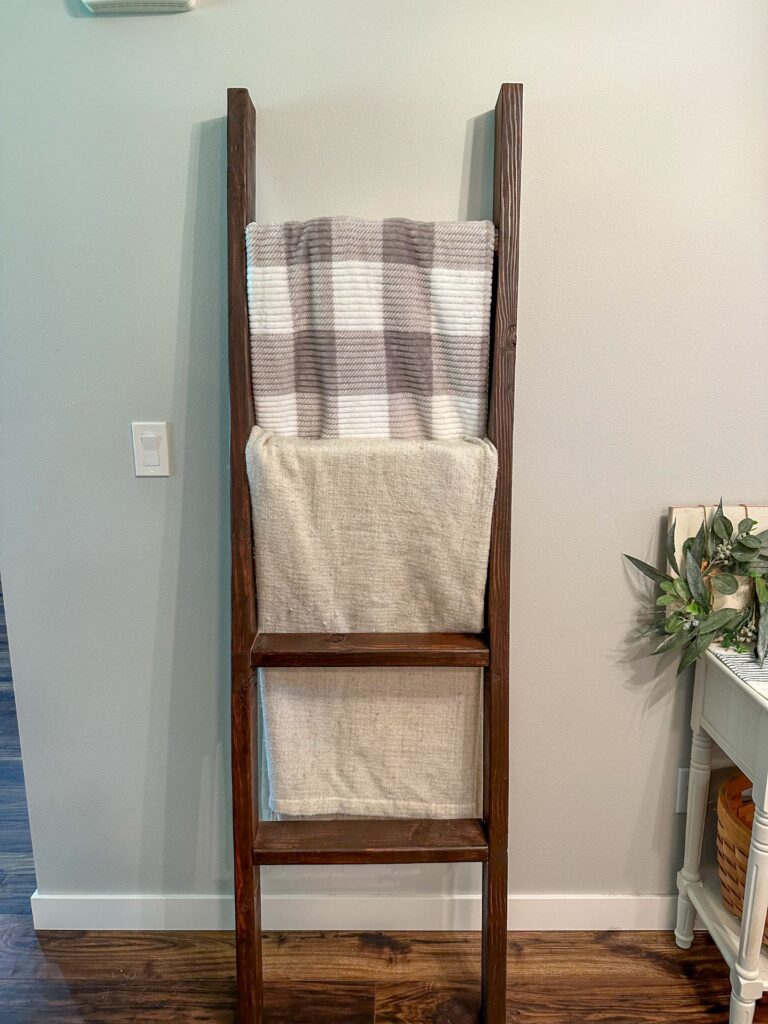
Do you love cozy blankets but hate them just lying around?
Well here is a vertical storage option that doesn’t break the bank. Learn how to build a blanket ladder for cheap. You might even have these supplies on hand.
(As an Amazon Associate, I earn from qualifying purchases.)
Materials:
- (2) 10ft 2×4’s
- (16) 2 ½ inch screws
- Sandpaper
- Stain
- Clear coat
- Felt pads or felt strip
Tools used:
- Tape measure
- Speed Square (used for straight edge and to mark the angle of the rungs)
- Paintbrush
- Old lint-free rag
- Drill
- Saw
- Sander (optional)
- Pencil
Cut list
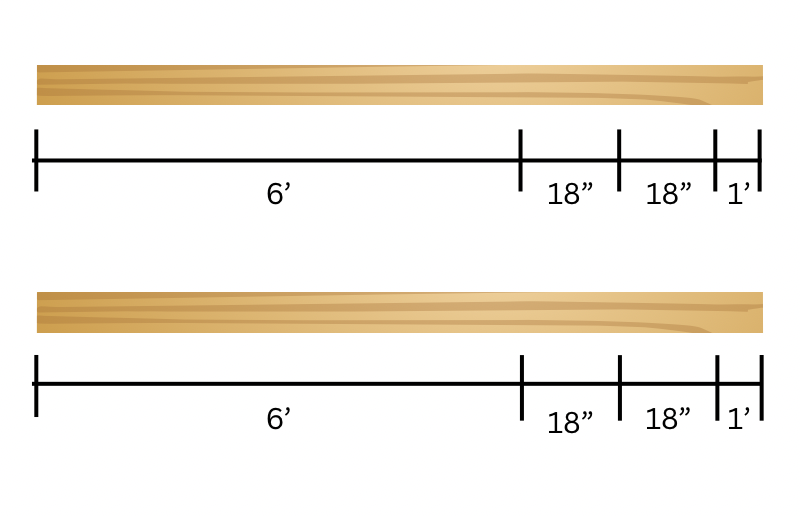
- 2 – 6’ long 2×4’s (Side rails)
- 4 -18” 2×4 (rungs)

You will have 1ft of scrap wood left over from each of the 10ft 2×4’s after you have made all of your cuts, but don’t worry. You could always use them for another project!
Step 1 – Side Rails
Cut two 6ft 2×4’s for your side rails.
Step 2 – Make your Cuts
Using the 4’ from each 2×4’s that you just cut off, cut four 18” pieces for your rungs.
Step 3 – Mark where your ladder rungs will be
On both of the 6’ side rails, measure from the top down 10” and make a mark. That will be the top of the first 18” ladder rung. From that mark, measure down 15 ½” and make a mark. That will be the top of the second rung. Repeat this process for the last two rungs. When you finish this step, you should have 4 marks on each side rail, one for each ladder rung.
Step 4 – Mark the angle of the rungs
After you have made all of your marks for the placement of the ladder rungs, you can use a Speed square to make an angle of 10 degrees on each of those marks you made and put a line with a pencil. If you do not have a square you will have to try and eyeball a slight angle on each one. You want these to all be angled in the same direction for all of the rungs. This is so that when you lean the ladder up against the wall at an angle, the rungs will then be parallel to the floor.
Step 5 – Assembly
Now that you know exactly where your 2×4’s will be, you can start screwing your 18” rungs to the side rails. Using 2 ½” screws will help with the sturdiness of the ladder. Use 2 screws per side per rung.
Step 6 – Sand
After everything is assembled, you can start sanding. You can sand however much you want depending on the softness you desire. If you want a more rustic look and feel, just give it a light sanding on the rough spots and it should be good. A sander would be the easier option but if you do not have a sander, you can just use a piece of sandpaper and sand it by hand.
Step 5 – Stain (if desired)
I used Varathane Dark Walnut wood stain, but you can choose whatever stain you like best. I would recommend using a clear coat after the stain dries or else the stain could more easily rub off onto your blankets or anything else that rubs up against it.
For my clear coat, I used
Varathane Ultimate Polyurethane water-based (clear matte)
Step 6 – Felt Pads
Finally, I would recommend putting felt pads where the ladder will be touching the walls. If you are going to be placing the ladder on a hardwood floor, I would recommend adding felt pads to the bottom also.
Now you have a cute and cozy way to hang all of your blankets!
This is an awesome idea! Can’t wait to try this in the near future, thank you for the step by step!